DIY Burlap Wall Organizer By Shades Online

Fall Inspiration: How To Make A Burlap Wall Organizer:
Fall season is my absolute favorite time of the year because it marks the beginning of when friends and family gather taking turns visiting each others’ homes for the upcoming holidays. This fall season we are doing a DIY project with the latest trend, BURLAP! Burlap compliments several interior décor styles. We especially like the burlap look tied in with our woven wood roller shades collections. For our project we are making a handy DIY Burlap Wall Organizer.
This simple DIY project can be displayed throughout these 3-4 FALL months to help our homes be clutter free yet tie in with any holiday décor.
Materials Needed: – Cork Board – Burlap Fabric – Ruler – E-6000 Glue or Hot Glue Gun – Tacks – Scissors – Wall Hook
Let’ Get Started!
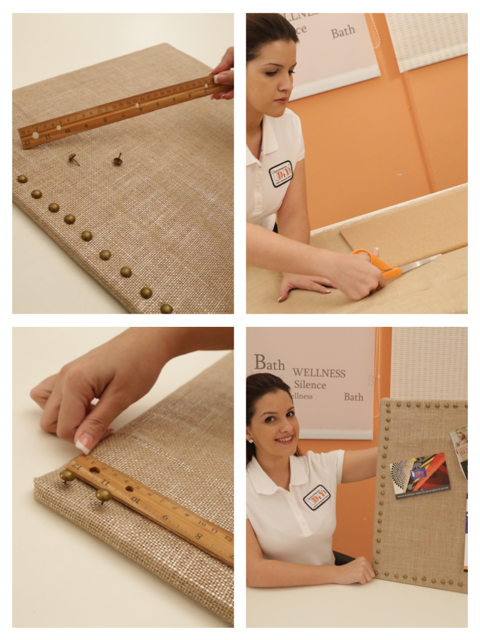
STEP 1: CUT FABRIC TO SIZE & IRON YOUR FABRIC IF NEEDED TO REMOVE ANY CREASES
STEP 2: GLUE YOUR FABRIC ONTO CORKBOARD
STEP 3: Now let’s add a border! I especially loved these BOLD fabric tacks as my decorative accents because it adds a bit of a high end touch to my project. BUT GET CREATIVE and pick your own style… ANYTHING GOES!
STEP 4: And, the last thing we need to do is add and hanger backing to your corkboard so you can display on your wall!
For a full video demonstration, join me on our YouTube Channel . Thank you so much for joining me on this month in the Craft Room with of Shades Online DIY!
Tags: arizona blinds, blackout roller shades, cheap blinds, colorado blinds, contemporary roller shades, custom blinds, custom made roller shades, custom roller shades, dallas blinds, el paso blinds, florida blinds, florida roller shades, ft lauderdale roller shades, georgia blinds, good cheap blinds, hialeah blinds, hollywood blinds, houston blinds, interior design to the trade, jacksonville blinds, kendall blinds, key largo blinds, key west blinds, light filtering roller shades, los angeles blinds, macon blinds, made in the usa blinds, melbourne blinds, miami blinds, miami lakes blinds, modern roller shades, naples blinds, new jersey blinds, new mexico blinds, new york blinds, odessa blinds, ontario blinds, orlando blinds, palm beach blinds, sacramento blinds, sanford blinds, santa monica roller shades, sarasota blinds, shades online, shades online diy, syracuse blinds, tampa blinds, west palm beach blinds, wholesale blinds, wholesale roller shades, window blinds, window shades, woodstock blinds, woven wood roller shades


